10 Jan 2002 - from http://www.ephotozine.com/
How to photograph buildings - We live in them, we work in them, and most of us sleep in them. But what about photographing buildings?
How to photograph buildings
We live in them, we work in them, and most of us sleep in them. But what about photographing buildings? Any one who has a camera has probably taking a picture of a castle, local church or tourist monument, but buildings offer much more scope from the intricate details of historical cathedral or the graphical shapes of modern architecture. We take most of the buildings around us for granted and with a little extra perception youll start to see a whole new way at looking at architecture and its many forms.What gear do you need? Any camera from a single-use to a sophisticated SLR is capable of recording a decent picture of a building. Ideally you will often need a wide-angle lens but if you do have a fixed option look around for viewpoints where you can get the whole building in shot. Walking back up the road away from the interesting architecture or stepping across the courtyard will give you the necessary space. Or you could play up the strengths of your fixed lens camera and move in close on smaller areas of the building. SLR users who invest in a wide-angle lens or those with a compact with a zoom lens can open up far more options. With a wide-angle you can fill the frame from close range and take shots when you normally wouldnt be able to, such as in a narrow street or from a confined viewpoint.
When using a wide angle you will find that walls of a tall building lean inwards when you shoot from a low angle. This can be prevented by using a special lens known as a shift lens to correct the perspective problems, but a less costly way is to find a distant viewpoint and use a longer lens or from close range if you can gain height by climbing a nearby hill or shoot from the upstairs window of a building opposite that will help. Specialist architectural photographers take step ladders with them to gain the height. Ideally you want to a viewpoint that positions you about halfway up the building any higher and the bottom of the building will start to slope inwards. These correction problems can also be sorted out using the transform tool of an image-editing program, which weve covered in a previous tutorial. You may, however, want to exaggerate the sloping walls, as I did in the above example, by shooting wide and going low. The alternative end of the spectrum is to use a long lens to home in on small details such as gargoyles on a church or an interesting carving in its masonry.
What film?
Slow speed film with fine grain will ensure you record all the subtle details in a building. This will ensure you record all the detail so you will be able to read any plaques or display boards, as well as see all the intricate carvings. As most of your pictures will be outdoors and the subject is static you can usually get away with using ISO film, which has very fine grain. You may prefer to try black & white and if so adding an orange filter to your kit will ensure that the brickwork is recorded with superb tonal range and the sky behind will be saturated with white clouds against the dark blue background sky.
If you venture inside youll need a tripod to avoid camera shake especially with church interiors that are often dimly lit. In brighter buildings lit by fluorescent or tungsten lighting you will need a filter when shooting using colour film. A tungsten (household type lamp or reflector type) will add an orange cast and needs an 80B blue filter to correct the colour, while a fluorescent strip lighting will introduce a green cast and needs AN FL-D magenta filter to correct the problem. If you have a digital camera the cameras automatic white balance control should sort out the colour. If not switch to manual and key in the appropriate setting, checking the LCD preview to see the effect.
Exposure
Photographing buildings is one of the easier subjects to measure the light from. In most cases the brick or stone is a similar tonal value to mid grey so the meter will record it accurately. Problems will generally only occur if the material used is very dark (coated glass) or very light (white painted structures) In these cases the camera will compensate making a dark building to light and a light building too dark. Open up a stop or close down one stop to compensate. So, for example, if the exposure you get is 1/30sec at f/8 when shooting a dark building select 1/60sec at f/8 or 1/30sec at f/11. If its 1/250sec at f/8 when shooting a white building, select 1/125sec at f/8 or 1/250sec at f/5.6. If your camera has exposure compensation set either 1stop or +1 stop respectively.
If you have an auto exposure lock point at your hand (if its in the same light as the building) and lock the exposure.One other area that can fool the camera is when the sun is behind the building and in the frame. The bright area will fool the camera into setting a shorter exposure and the building will become silhouetted. Point down so just the building is in the shot, take a reading and recompose using manual or the auto exposure lock.
They say a picture paints a thousand words so now lets look at some practical examples of techniques you can try.
A telephoto lens can also be used to create dramatic patterns by filling the frame with a repetitive brick structure, modern glass building fascia or tiled rooftops. Shoot from an oblique angle and the perspective will change dramatically creating lines disappearing towards a vanishing point

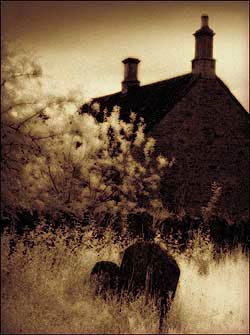
Above: Use am arch or tree to provide a natural frame around your picture.


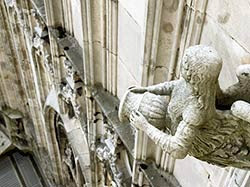
You are often allowed to climb up to the rooftops of churches or cathedrals and doing so present many photographic opportunities. As well as gaining you a great viewpoint of the city you can often find interesting statues projecting out from the walls. This shot taken at the Duomo in Milan. Just one of its 3500 statues to choose from!


0 comments:
Post a Comment